Open Air vs. Enclosed Photo Booth: Which Style Fits Your Reception Space?
Open-air booths or enclosed? It’s a showdown! Open-air booths are budget-friendly and flexible, needing just 3′ x 3′. They’re great for interaction and fitting larger groups with nimble setups. Enclosed booths? That 8×8-foot space comes with nostalgia and limits—you might squeeze 6-7 people in for a cozy, classic vibe. Want quality pics? Lighting matters. Plus, crack the code on aesthetic backdrops, power setups, and budget booby traps. Ensure your reception doesn’t fall flat—stay tuned!
Quick verdict: open-air vs enclosed photo booth—what works best for your reception space?
How do you decide between an open-air or enclosed photo booth for your reception? Let’s break down the photo booth format comparison to assist you in choosing the right booth style options for your big day.
- Venue Flexibility: Open-air booths slide into tight spaces and accommodate mobility needs. Enclosed booths, however, hog an 8×8-foot space. Who doesn’t love a room hog?
- Cost Efficiency: Open-air setups win the budget battle with simpler equipment and less setup hassle. Enclosed booths? More costly, more complex.
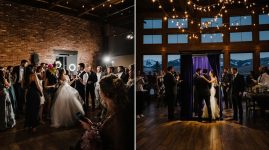
- Guest Experience: Open-air encourages mingling and social fun. Enclosed provides private nostalgia—perfect for those who love a classic mall vibe.
- Customization Options: Open-air boasts endless backdrop creativity. Enclosed booths focus on intimate, branded interiors. Open-air photo booths are popular among wedding planners and corporate hosts for their flexibility and ability to capture interactive experiences. Choose wisely!
At-a-glance comparison: footprint, guest capacity, backdrop needs, and photo quality
Sure, you’ve got your venue sorted and your budget in mind, but what’s next? Choosing between an open-air vs enclosed photo booth can influence your reception’s vibe. Open-air booths, with their 10x10x8 feet footprint, accommodate up to 20 guests and provide customizable backdrops, perfect for those who want flexibility. An enclosed booth, needing 8×8 feet, limits you to 6-7 guests but guarantees intimate, polished photos. Typically, a Mirror Me Photo Booth, which is a popular choice for weddings, can fit 15-20 people comfortably in one photo.
Here’s a quick comparison:
| Attribute | Open Air Booth | Enclosed Booth |
|---|---|---|
| Footprint | 10x10x8 feet | 8×8 feet |
| Guest Capacity | 10–20 guests | 6–7 guests |
| Backdrop Options | Unlimited, customizable | Limited customization |
Open-air setups are adaptable but may need careful lighting tweaks. Enclosed options provide consistent results but demand more space. Choose wisely!
Space planning: the minimum area you realistically need for each
Let’s face it, space can be a premium at your event, and you don’t want your photo booth crammed in a corner like an afterthought. Your choice between an open booth vs enclosed booth hinges on understanding photo booth space requirements. An open-air booth can fit snugly into a 3′ x 3′ space without a backdrop, while an enclosed booth demands at least 5′ x 5′ for a cozy fit. But here’s where it gets interesting: Open-air photobooths offer flexible layouts for larger group shots, making them an ideal choice if you expect many guests to use the booth at once.
| Photo Booth Type | Minimum Space Needed |
|---|---|
| Open-Air | 3′ x 3′ (0.9m x 0.9m) |
| Open-Air w/ Backdrop | 8′ x 8′ x 8′ (2.4m x 2.4m x 2.4m) |
| Enclosed | 5′ x 5′ (1.5m x 1.5m) |
Open-air booth deep dive (pros/cons + best placement ideas)
Choosing the right photo booth isn’t just about space—it’s about the vibe you want at your event. Open-air booths bring modern flair and group inclusivity but face challenges like privacy and lighting. Let’s weigh the options in the open air vs enclosed photo booth debate:
- Pros:
- Space Efficiency: Perfect for tight venues needing photo fun.
- Accessibility: Welcomes everyone, from large groups to guests with mobility needs.
- Cost-Effective: Less equipment means less cost.
- Comfort: No heat buildup—great for summer weddings.
- Cons:
- Privacy: Some guests might shy away without an enclosure.
- Lighting & Weather: Sun, wind, and shadows can play havoc with photos. Open air photo booths encourage social interaction and engagement among guests, making them a popular choice for lively events. Garden wedding settings can often require additional rentals like tents and generators, which should be factored into planning for the booth placement and overall setup.
Place it centrally, yet unobtrusively on stable ground for best results.
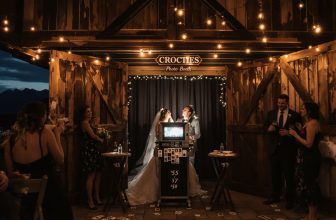
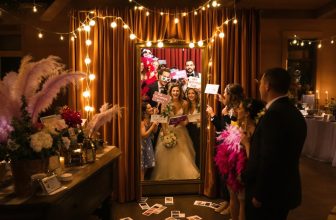
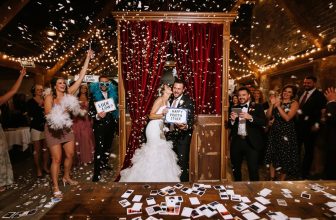
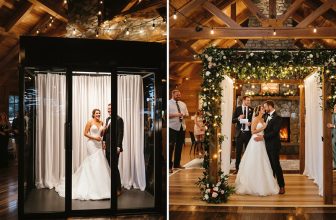
Enclosed booth deep dive (pros/cons + best placement ideas)
While some folks might romanticize open-air photo booths, enclosed booths provide privacy and nostalgia in spades. They’re perfect if you want a classic vibe, but they do come with quirks. Here’s the scoop:
- Privacy Enhancement: Guests can let loose without feeling like they’re on stage. Spontaneity? Check.
- Nostalgic Appeal: These booths scream vintage arcade. If retro charm’s your gig, search no more.
- Space and Accessibility: They need around 8×8 feet and aren’t exactly wheelchair-friendly. Plan accordingly. Enclosed photo booths offer a consistent environment, protecting against distractions and ensuring quality photos.
- Limited Group Capacity: Most fit 2-4 people. Bigger groups? You’ll need a larger model, but expect space trade-offs.
For placement, avoid high-traffic areas. Tuck it in a cozy corner, ensuring easy access without blocking the main event flow.
Lighting and background rules: what makes photos look pro in each setup
When it comes to nailing that pro-level photo, lighting and background are your MVPs. Whether you’re opting for an open air or enclosed booth, the right setup creates all the difference. Here’s how to get it right:
Lighting and background are key to capturing pro-level photos; the right setup makes all the difference.
- Open Air Booths: Use continuous LED panels or ring lights. You need 5400+ lux to outshine natural light. Adjustable color temps (3000K-5800K) are a must.
- Enclosed Booths: Go for ring lights or strobes with softboxes. These eliminate shadows and work well with indoor lighting.
- Light Placement: Position key lights at a 45-degree angle, slightly above eye level, to add dimension.
- Background Techniques: Use backlights and accent lights for depth. Layered lighting enhances scene composition. Matching color temperature to the wedding theme creates a cohesive look, ensuring a unified aesthetic in the photos.
Get these right, and you’re golden!
Line management tips (so the booth doesn’t hijack your dance floor)
You’ve got the lighting and background nailed, but let’s talk about something that can really throw a wrench in your perfect photo booth setup: line management. You don’t want a chaotic crowd taking over your dance floor, do you? To keep things smooth, try these tips:
- Strategic Placement: Keep the booth away from the dance area. High-traffic spots like entrances work best.
- Digital Queue Systems: Use tech to let guests reserve slots. It keeps physical lines short and sweet.
- Professional Attendants: Hire attendants to guide guests and manage lines efficiently. They’re lifesavers in chaos prevention.
- Timing Coordination: Focus staffing during the final 2-hour peak demand. Dinner time adjustments can keep things flowing. Remember, 82% of guests visit the photo booth multiple times, so efficient line management is crucial to avoid bottlenecks.
When selecting a venue, consider those with transparent pricing to ensure efficient budgeting for all aspects of your event, including photo booth arrangements.
Keep these tips in mind to maintain your reception’s rhythm!
Budget and upgrade traps (backdrops, props, unlimited prints, premium templates)
Steering through the world of photo booth rentals can feel like walking through a minefield of hidden fees and sneaky upsells. You’re lured in by a tempting base price, but then comes the avalanche of extras. Beware of these common traps:
- Backdrop Upgrades: A standard backdrop might be included, but premium options like sequin or custom creations could add $50–$600 to your bill.
- Prop Packages: Basic prop sets might be free, but premium props can cost an extra $49.99.
- Template Customization: Basic templates are standard, but custom layouts or animated GIFs require costly upgrades.
- Unlimited Prints: Unlimited 2×6 prints sound great until you realize they’re an extra $50/hour. Hidden costs in KRUU’s packages can be misleading, making it crucial to thoroughly evaluate any additional fees before committing to a rental service.
Keep an eye out, or your budget might just disappear!
Educational only: confirm venue layout, power, and access rules with your vendor
Before you plunge into booking that trendy photo booth for your event, verify you’ve done your homework on venue logistics—unless you enjoy last-minute chaos. Think space, power, and access rules because they’re not just nitpicking details. Here’s what you need to confirm:
- Space Requirements: You’ll need a minimum space of 6′ x 9′ x 10′. That’s non-negotiable for proper setup. Check your venue’s layout.
- Power Availability: A dedicated 15-20 amp circuit at 110V is a must. Sharing with DJ equipment? Bad idea. Ensure background is aesthetically pleasing and free from clutter to enhance the overall guest experience.
- WiFi and Connectivity: Verify a strong, dedicated WiFi signal. Your booth’s social sharing depends on it.
- Load-In and Safety: Verify a straightforward load-in route is accessible, and all cables are safely covered. Consider the importance of emergency plans at your venue to ensure guest safety and compliance with regulations.